Overview
Overview
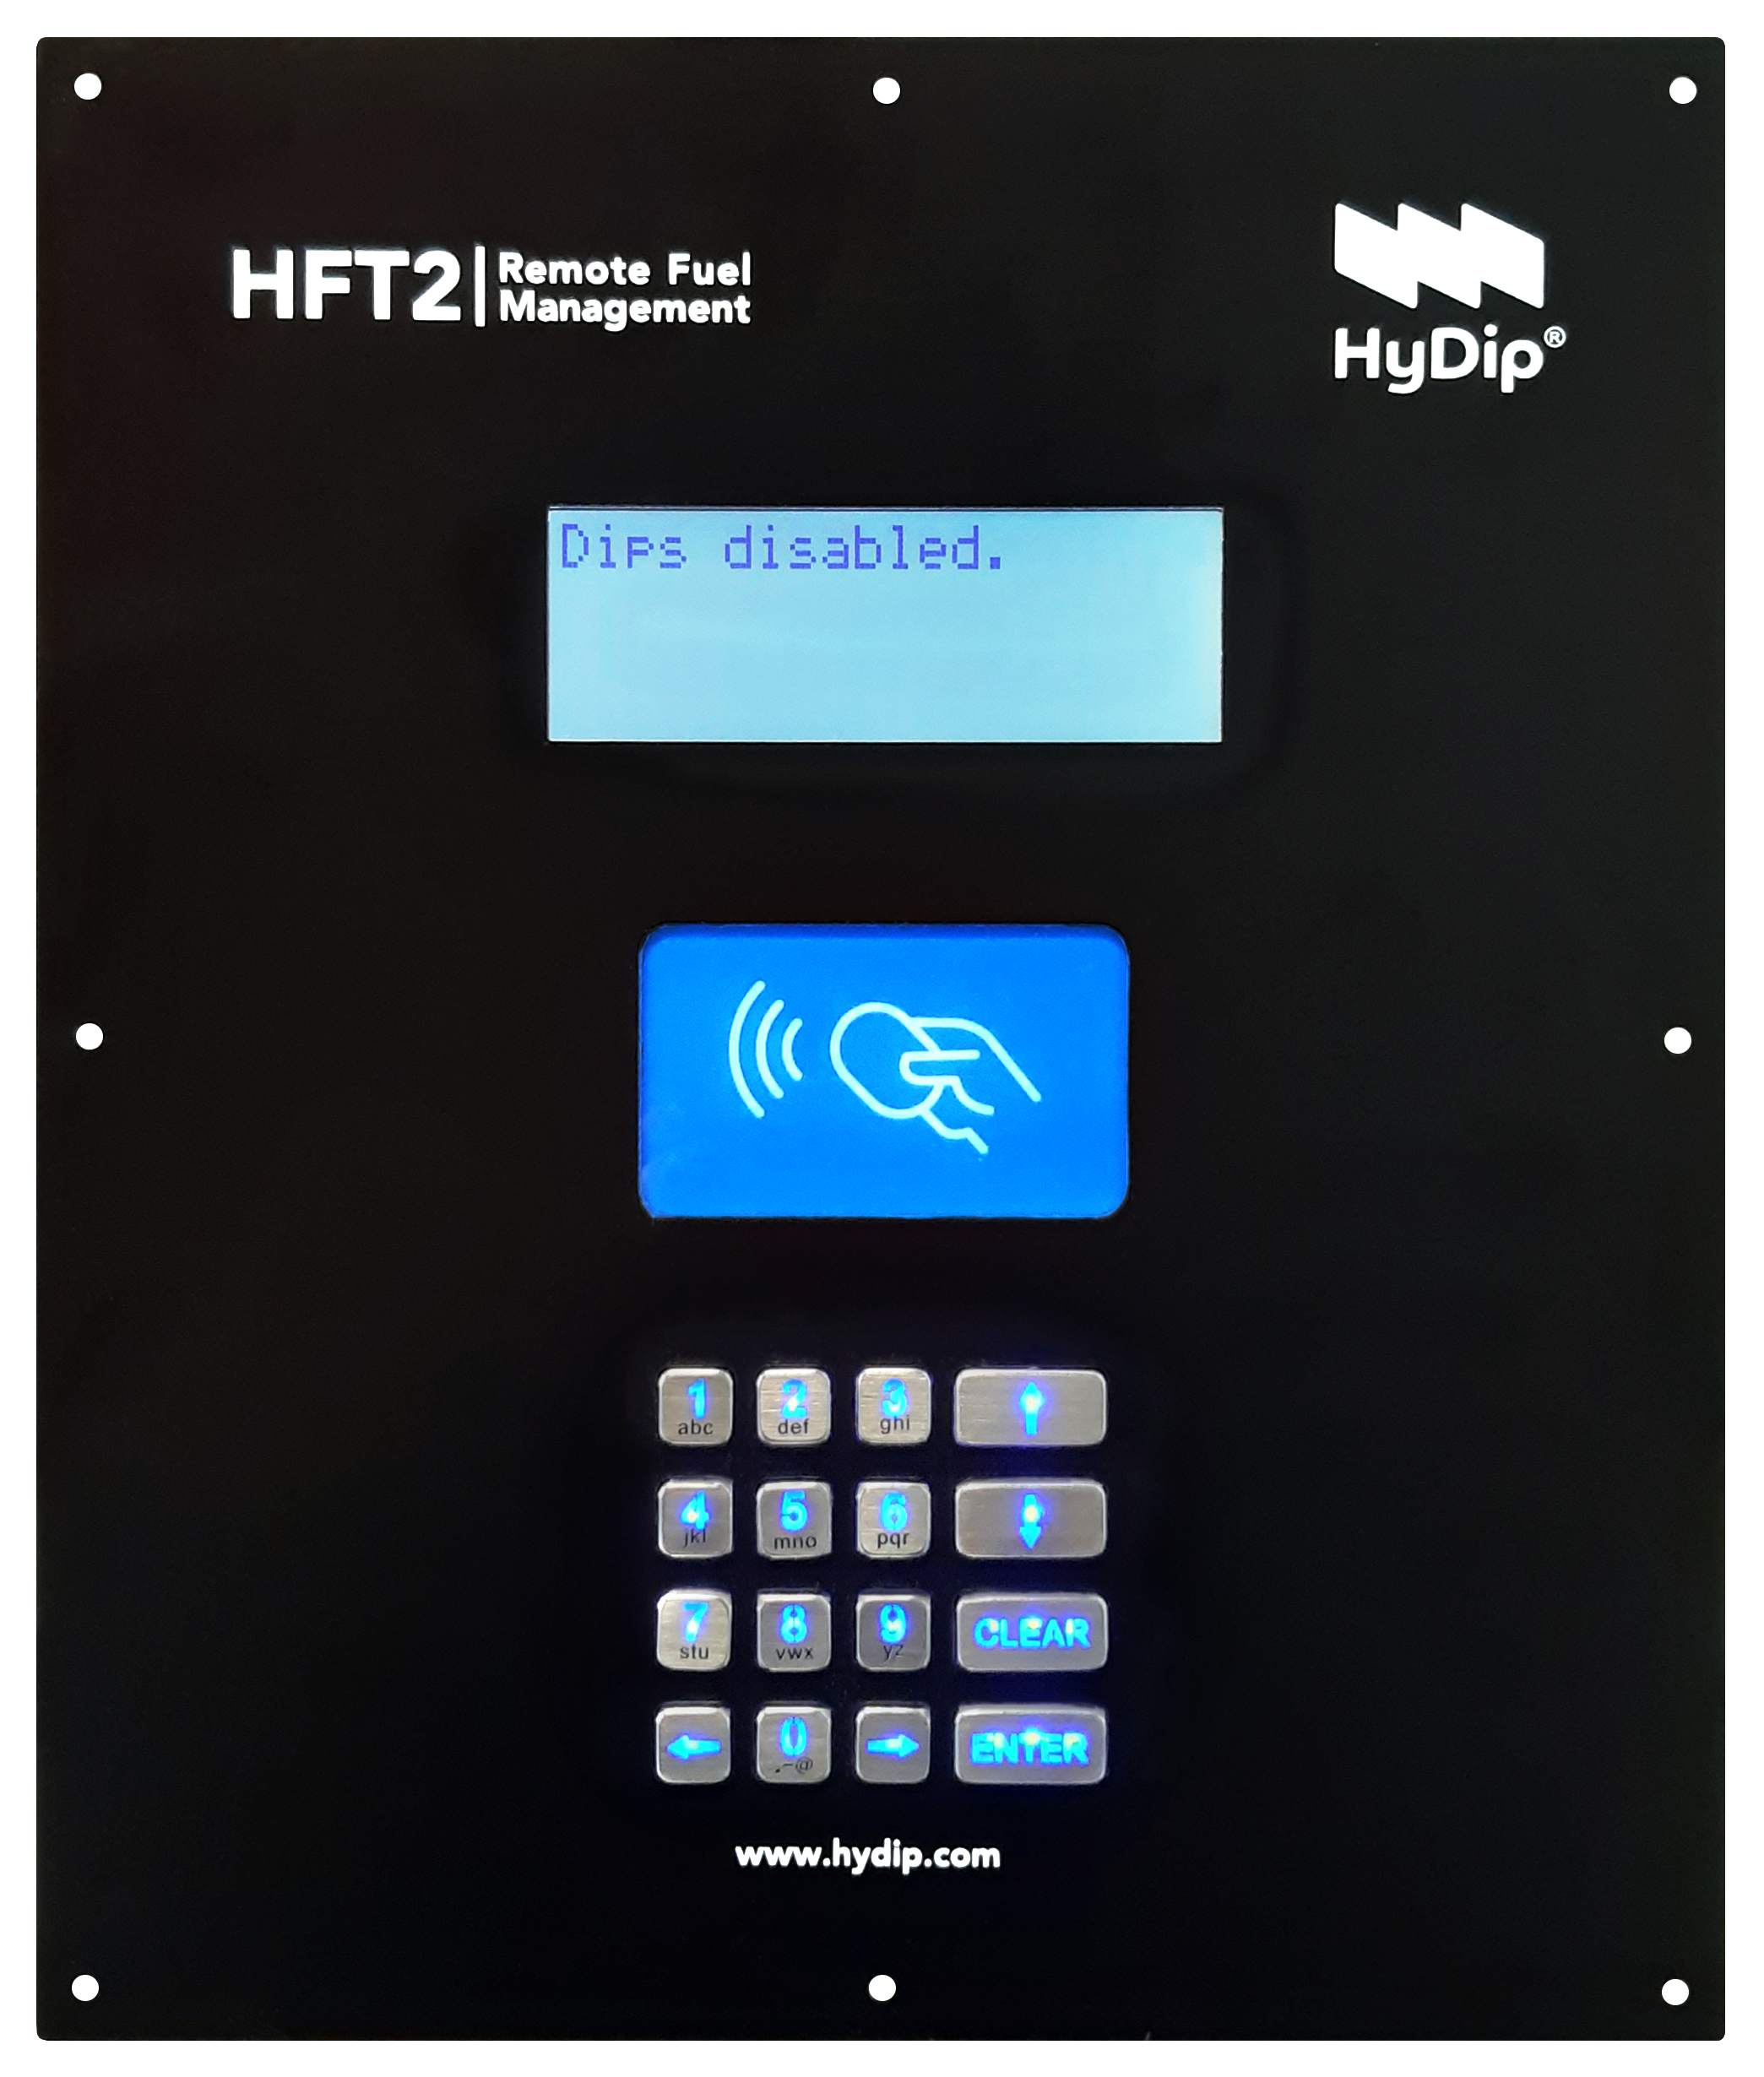
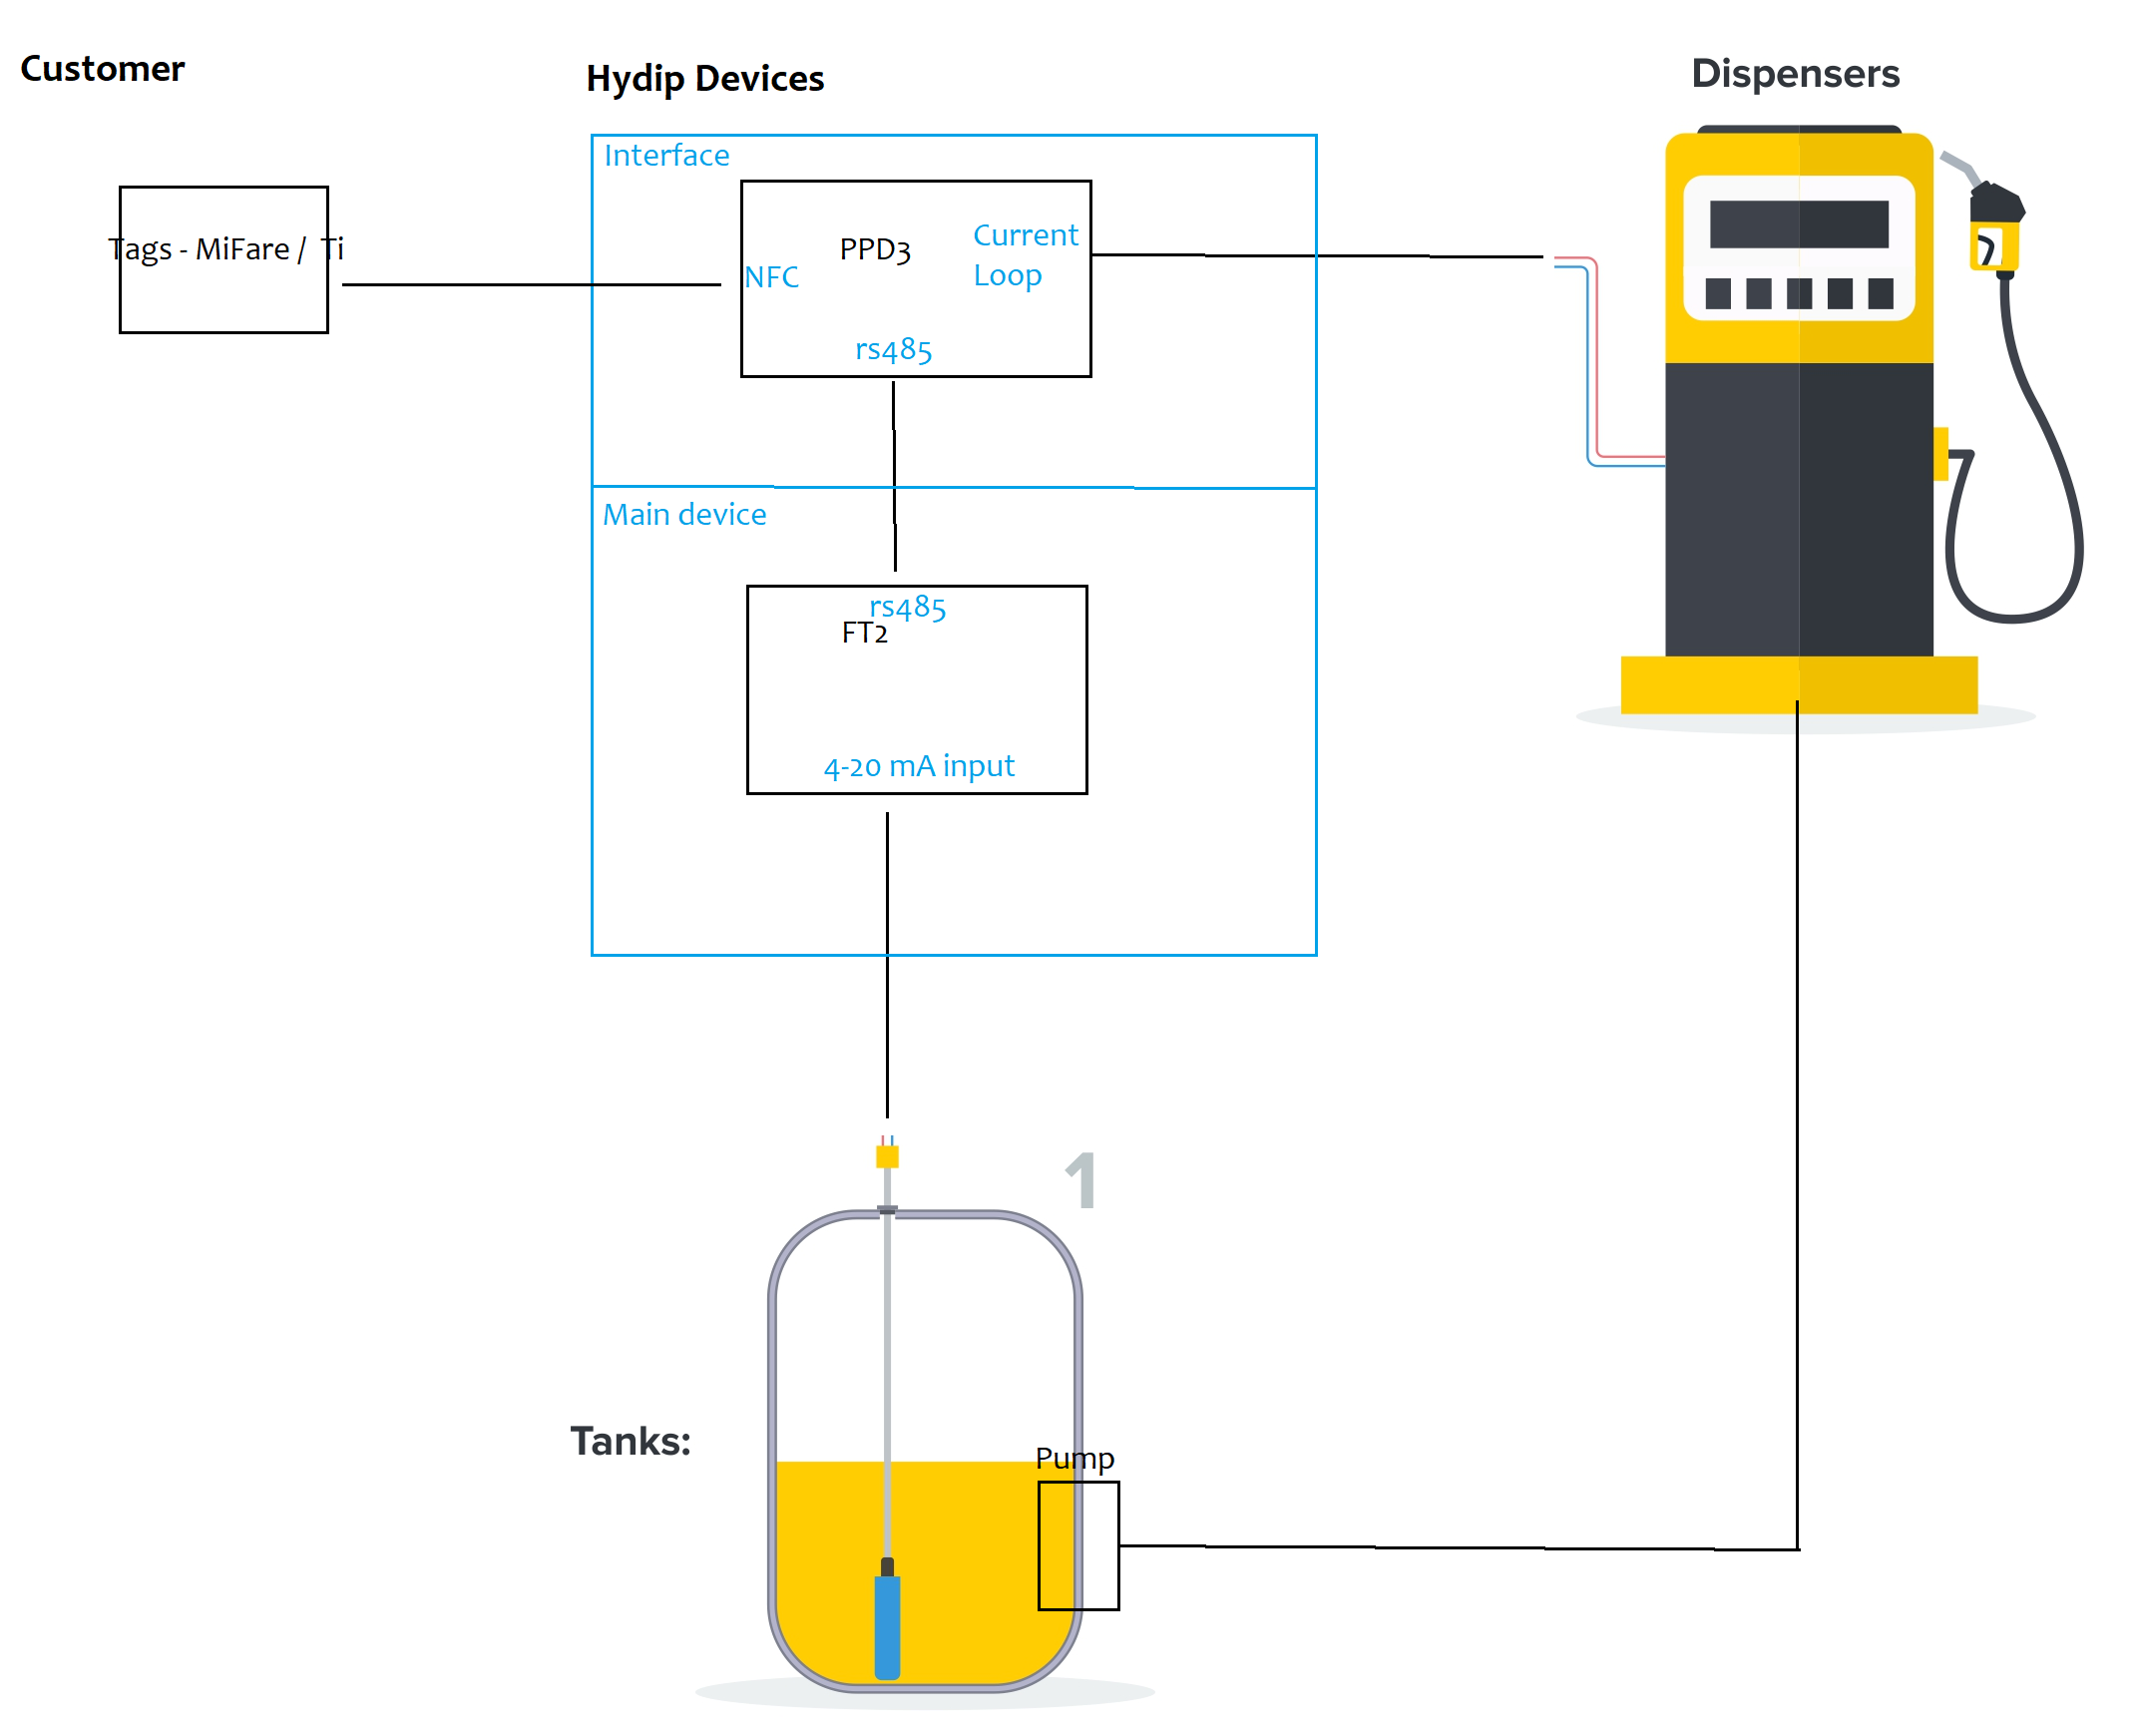
The HyDip Fuel Tracking 2 (HFT2) is a device used to integrate already existent dispensing equipment on a Site into Hydip. Once connected to the internet, through an HFT2 and a Pinpad combination the operator will be able to see tank dip activity as well as fuel dispensing activity, configured and managed via the HyDip website.
Features
- Communications with many 3rd party Dispensers (through a Pinpad 3 or 2 device).
- Tank gauging.
- Internet communication via 3G/4G as well as via Ethernet.
- GPS.
Dimensions
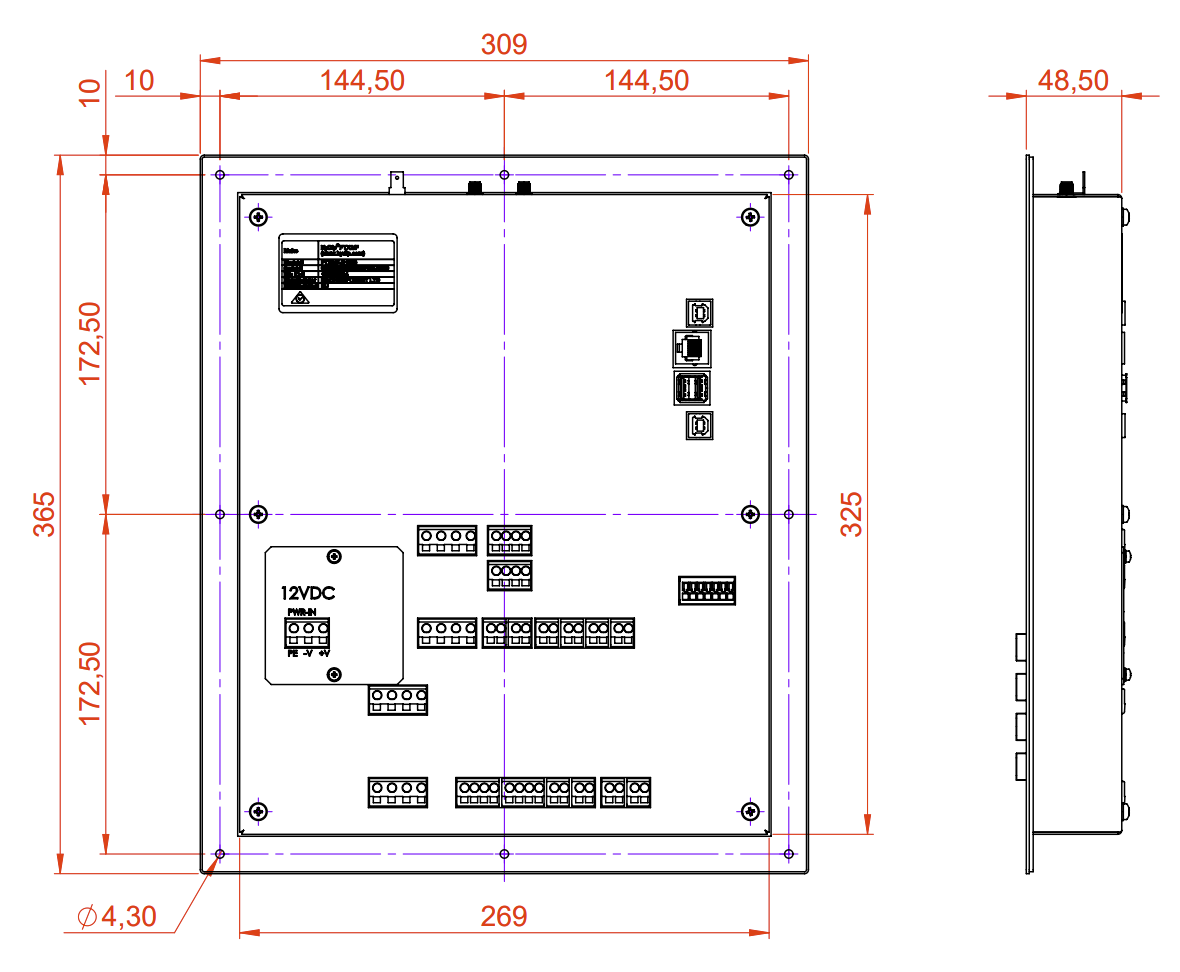
Connectors
On the main board:
Connector Label | Function |
|---|---|
X1 |
|
X2 |
|
X3 |
|
X4 |
|
X5 |
|
X6 |
|
X7 | Sensor #1 |
X8 | Sensor #2 |
X9 | Sensor #3 |
X10 | Sensor #4 |
On the addon board:
Connector Label | Function |
|---|---|
XA1 | Sensor #5 |
XA2 | Sensor #6 |
XA3 |
|
XA4 |
|
XA5 |
|
XA6 |
|
XA7 |
|
XA8 |
|
Wiring
Sensors - 4-20mA:

Electrical safetyPlease follow these guidelines to ensure safe connections:
- The HyDip device should be installed by a certified electrician.
- Follow all local codes for safety requirements. Pay particular attention to electrical codes.
- Ensure there is a good electrical connection between the HyDip enclosure earth terminal and back panel chassis.
- Use shielded cabling for all communication cables, ensuring the cable shielding is properly grounded.
Internet
Ethernet - For ethernet connection to be established it is enough to simply plug in an ethernet cable from the HyDip device to a router prior to device's power up. The connection will be configured automatically.
3G / 4G - Open the back enclosure of the device, find a SIM card slot as shown below and insert a SIM card with IP data traffic enabled and PIN disabled.

Power on the device and set up your SIM card's network details. Use the Menu and arrow buttons to select Service Menu > Settings > Network > 3G/4G-LTE > Preset . Then choose your network, and press ENTER. The device will automatically attempt to connect using the new 3G/4G connection until it succeeds.