First power up
When you have made the power and signal connections, turn the HyDip Tank Gauging device on by switching the main power switch on the right side plate to position “I”.
On power up, the device will attempt to synchronize over the internet. With the use of Ethernet the device should connect automatically, but for the initial start-up on a 3G/4G set-up you may first need to adjust the 3G/4G configuration.
If the device has been correctly configured it will connect to the internet, obtain the correct system time, and download a new firmware upgrade if one has been posted. This start-up procedure may take a few minutes.
If the synchronisation fails on startup, establish the internet connection configuration as described below.
Main display on start-up
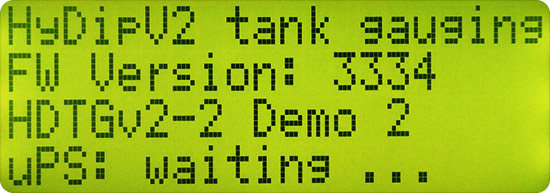
The main display will first appear briefly as below:

Power up screen for HyDip device
It will go through an initialisation process of Xbee, Bluetooth and uPS subsystems. The device should then go to the standard (tank level measurement) screen. On initial start-up the dip readings will not be correct as the device and sensor need to be calibrated.

The standard (tank measurement) screen.
If your network happens to use a standard configuration (this often happens for Ethernet), the HyDip controller may connect to the internet automatically using the factory presets.
If it doesn’t connect to the internet automatically, you will need to correctly configure controller for the internet connection using the Settings menu.
Connecting to the internet: 3G/4G
After the SIM card has been inserted, the corresponding APN (Access Point Name) must be chosen to allow HyDip to use it. Your SIM card provider should be able to provide the correct APN for your network.
To set up or check the APN, use the MENU and arrow buttons to select Settings > Network > 3G/4G-LTE > Preset
Then choose your network, and press ENTER.
The HyDip controller will automatically attempt to connect using the new 3G/4G connection until it succeeds. To manually force a sync through the network, scroll through the Menu and select Sync.
If there are connection problems, check the network settings exactly match those of your mobile provider.
Connecting to the internet: Ethernet
The HyDip controller will by default use DHCP (Dynamic Host Communication Protocol) to connect to the internet automatically. This works for most networks.
If you need to configure an advanced configuration (with a static IP or gateway), use the MENU and arrow buttons to select Settings > Network > Ethernet > Set IP manually and press ENTER to modify the network settings.
The HyDip controller will automatically attempt to connect using the new Ethernet connection until it succeeds. To manually force a sync through the network, scroll through the Menu and select Sync.
If the time zone on the device is not correct, it can be corrected online using the HyDip website control panel. Any time zone changes will update automatically the next time the HyDip controller synchronizes with the HyDip Website.
Over the air updates
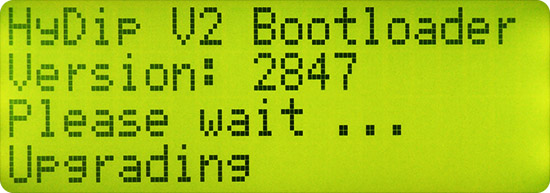
During a sync, the server may send new firmware to the controller. If an upgrade is being downloaded, the display will appear as below:

Firmware upgrade screen. The version number will be different.
Once the firmware upgrade or downgrade is complete the controller will reboot and return to its normal operating mode.
Micro-UPS in the start-up process
To ensure data integrity, the HyDip Tank Gauging device has its own internal micro-UPS (micro-uninterrupted power supply / µPS) that comes into effect if there is an external and 6V battery power interruption. If all power is lost, the µPS will carry out a controlled termination of any dispensing transaction, and record the transaction details up to the time of the termination.
When the device is first switched on it waits for uPS to be ready and will display a message when it is. Then it will continue with the start-up process.
Updated 10 months ago
